前言
继续…
Flask 模板渲染
模板是包含占位符的 HTML 文件
Flask 使用 Jinja2 模板引擎来处理模板渲染。模板渲染允许你将动态内容插入到 HTML 页面中,使得应用能够生成动态的网页内容。
- 创建模板:将 HTML 文件放在 templates 文件夹中,使用 Jinja2 占位符。
- 渲染模板:使用 render_template 函数在视图函数中渲染模板。
- 模板继承:创建基础模板,允许其他模板继承和扩展。
- 控制结构:使用条件语句和循环在模板中控制逻辑。
- 过滤器:使用过滤器格式化变量数据。
- 宏和模板包含:创建和使用宏以及模板包含,提高模板的复用性。
- 安全性:Jinja2 默认对模板变量进行自动转义以防止 XSS 攻击。
- 模板上下文:将数据传递给模板,并在模板中使用这些数据。
基本概念/创建模板
模板是包含占位符的 HTML 文件。
Flask 使用 Jinja2 模板引擎来渲染这些模板,将 Python 数据插入到 HTML 中,从而生成最终的网页。
1
2
3
4
5
6
7
8
9
10
| <!DOCTYPE html>
<html>
<head>
<title>Welcome</title>
</head>
<body>
<h1>{{ title }}</h1>
<p>Hello, {{ name }}!</p>
</body>
</html>
|
app.py
1
2
3
4
5
6
7
8
| from flask import Flask, render_template
app = Flask(__name__)
@app.route('/')
def index():
return render_template('index.html',title='Home',name='Misha')
if __name__ == '__main__':
app.run(debug=True)
|
格式: {{ 变量名 }}

模板继承
root.html
1
2
3
4
5
6
7
8
9
10
11
12
13
14
15
16
17
| <!DOCTYPE html>
<html>
<head>
<title>{% block title %}My Website{% endblock %}</title>
</head>
<body>
<header>
<h1>My Website</h1>
</header>
<main>
{% block content %}{% endblock %}
</main>
<footer>
<p>Footer content</p>
</footer>
</body>
</html>
|
leaf.html
1
2
3
4
5
6
7
8
| {% extends "root.html" %}
{% block title %}Home Page{% endblock %}
{% block content %}
<h2>Welcome to the Home Page!</h2>
<p>Content goes here.</p>
{% endblock %}
|
app.py
1
2
3
| @app.route('/leaf')
def leaf():
return render_template('leaf.html')
|
检查响应的内容确实被替换了
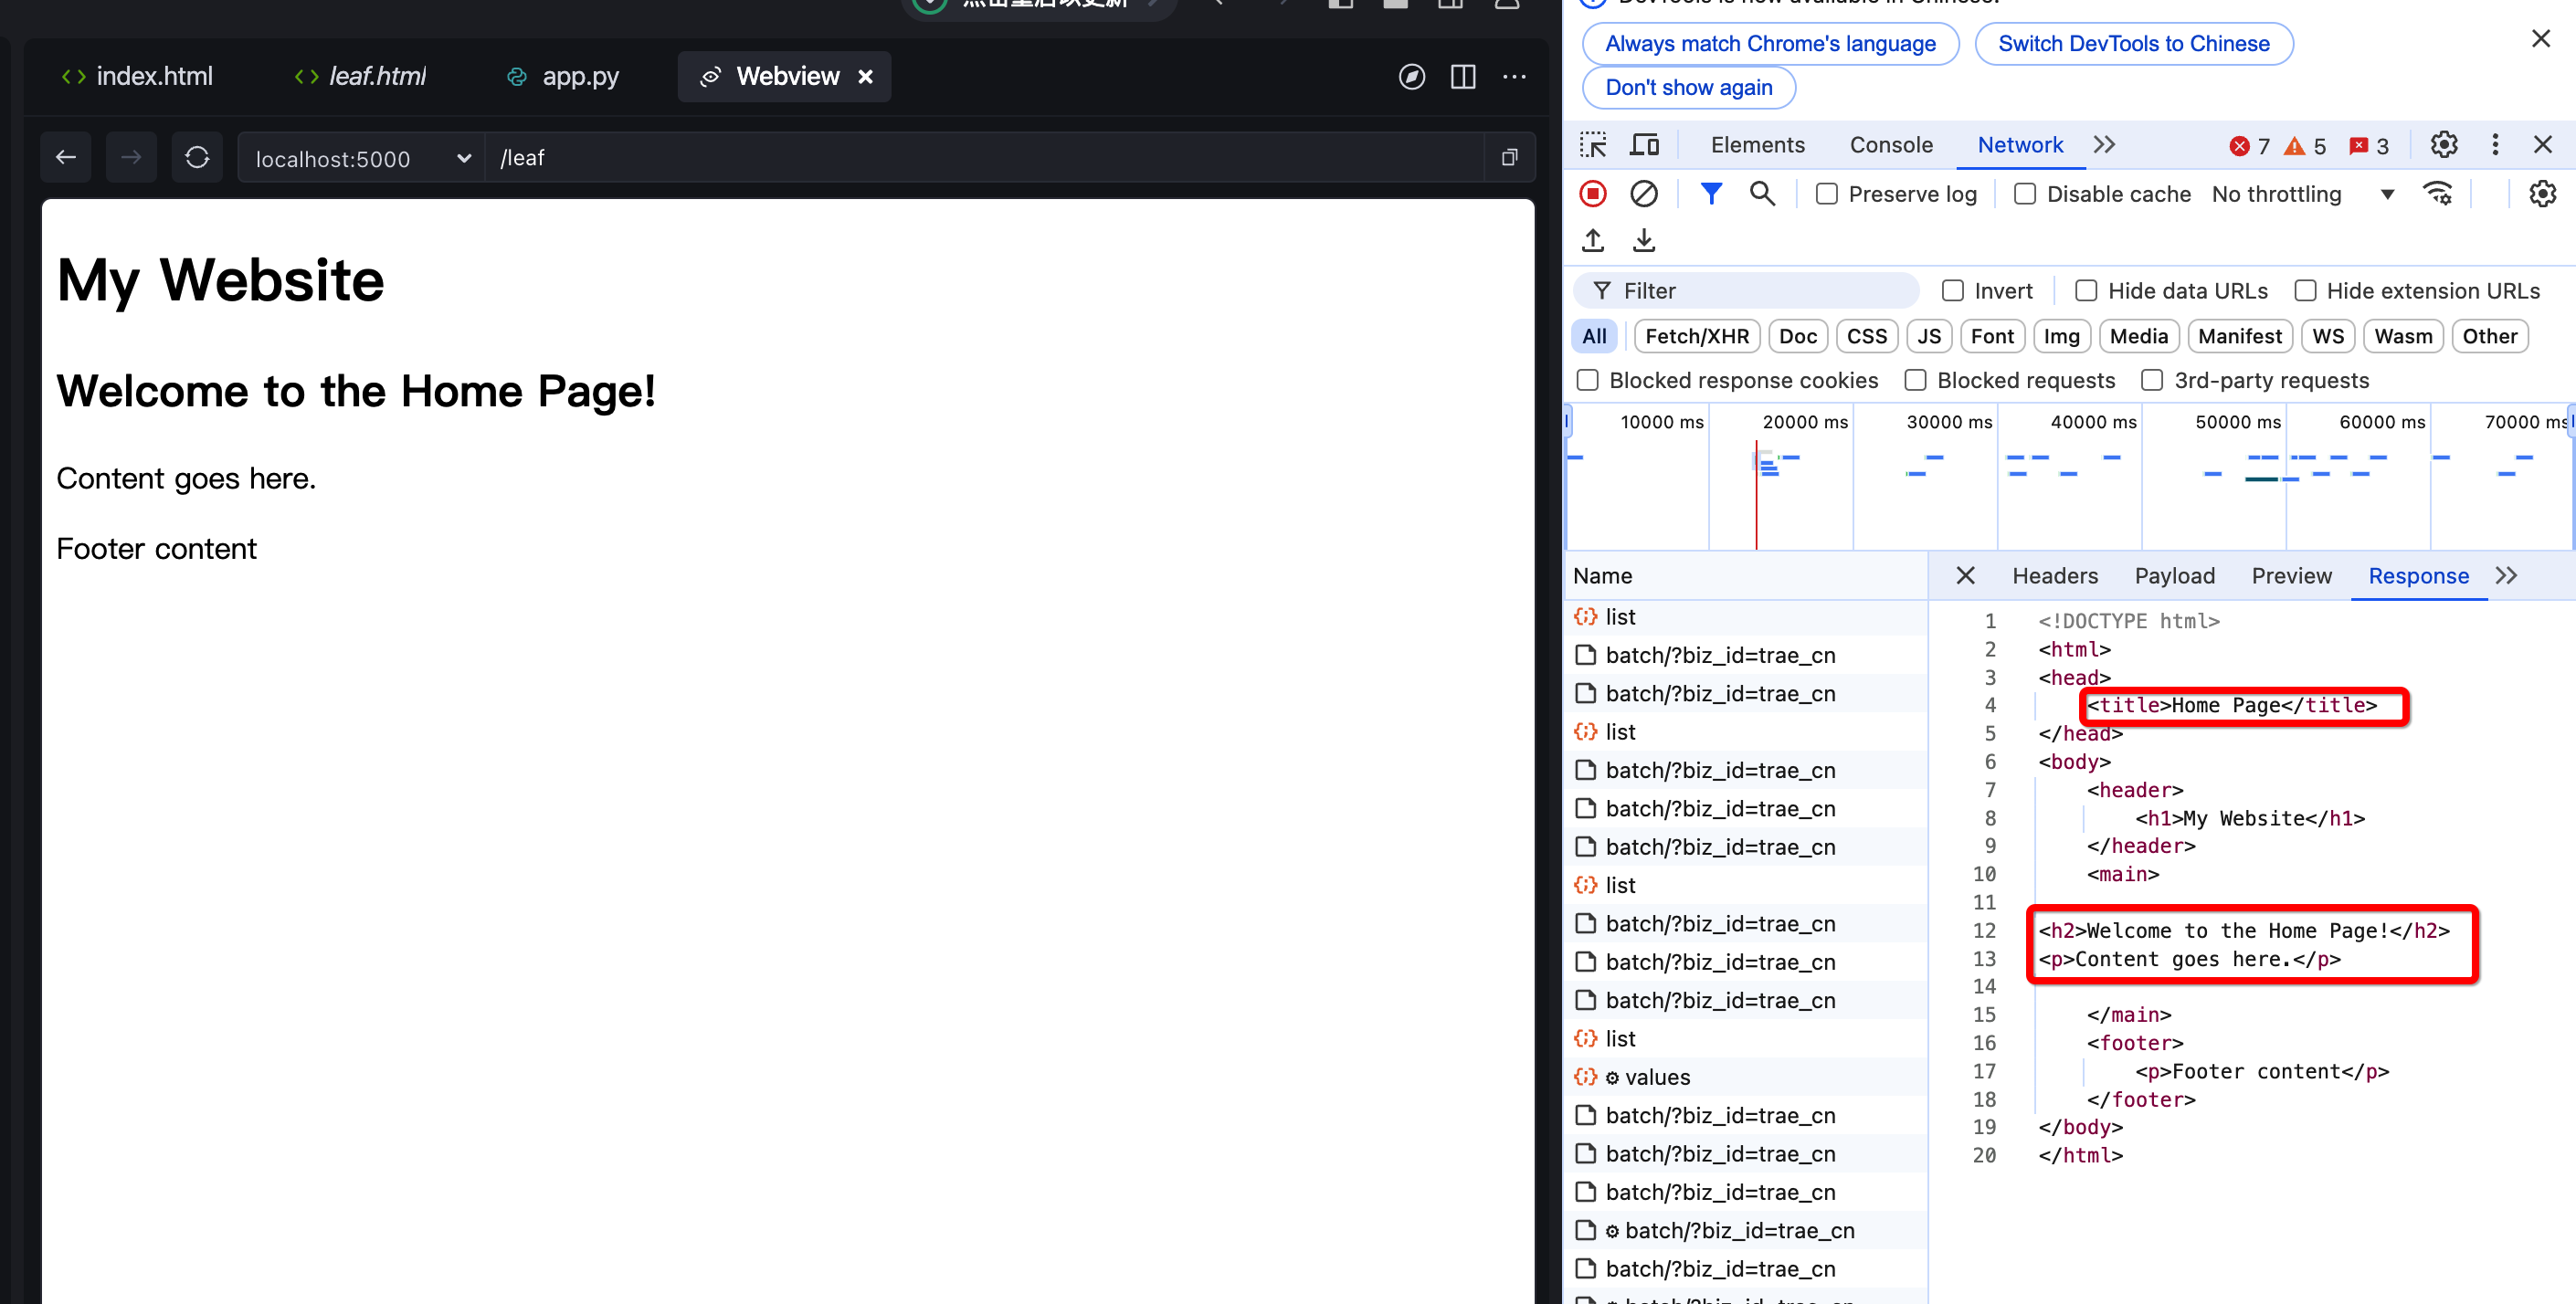
格式:可替换区域 {% block 变量名 %} {% endblock %}
控制结构
Jinja2 提供了多种控制结构,用于在模板中实现条件逻辑和循环。
ctrl_flow.html
1
2
3
4
5
6
7
8
9
10
11
12
13
14
15
16
17
18
19
20
21
| <!DOCTYPE html>
<html>
<head>
<title>Welcome</title>
</head>
<body>
{% if user %}
<p>Welcome, {{ user }}!</p>
{% else %}
<p>Please log in.</p>
{% endif %}
<ul>
{% for item in items %}
<li>{{ item }}</li>
{% endfor %}
</ul>
</body>
</html>
|
app.py
1
2
3
4
5
| @app.route('/ctrl_flow')
def ctrl_flow():
return render_template('ctrl_flow.html',user="Zhangsan",items=['apple','banana','orange'])
|
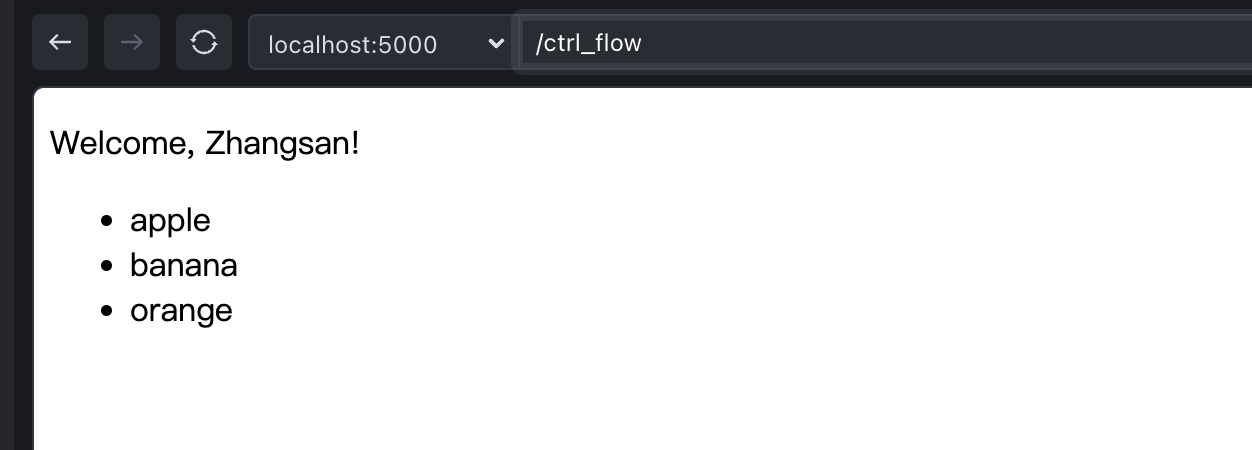
传了user

未传user和items

传了user和items
过滤器
过滤器用于在模板中格式化和处理变量数据。
filter.html
1
2
3
4
5
6
7
8
9
10
| <!DOCTYPE html>
<html>
<head>
<title>Welcome</title>
</head>
<body>
<p>{{ name|capitalize }}</p>
<p>{{ price|round(2) }}</p>
</body>
</html>
|
app.py
1
2
3
| @app.route('/filter')
def filter():
return render_template('filter.html',name='wangwu',price=2.999)
|
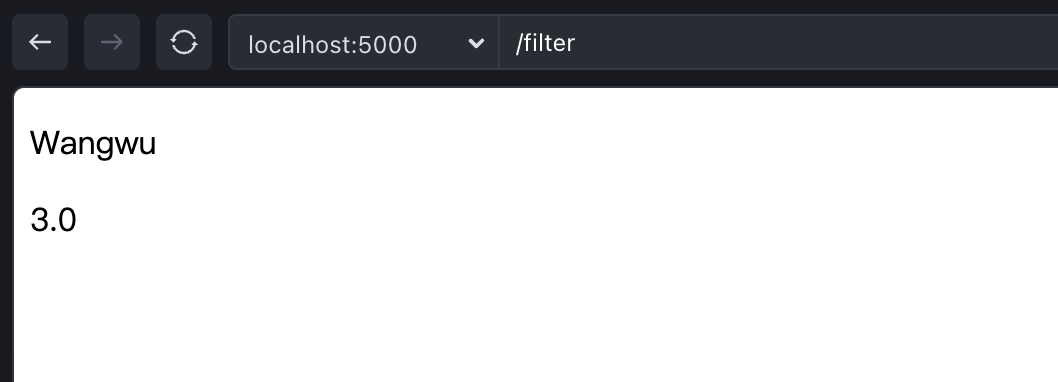
过滤器的写法与shell中的管道一样都是用”|”来表示
格式: {{ 变量名|处理方法 }}
宏和模板包含
macros.html
1
2
3
4
5
6
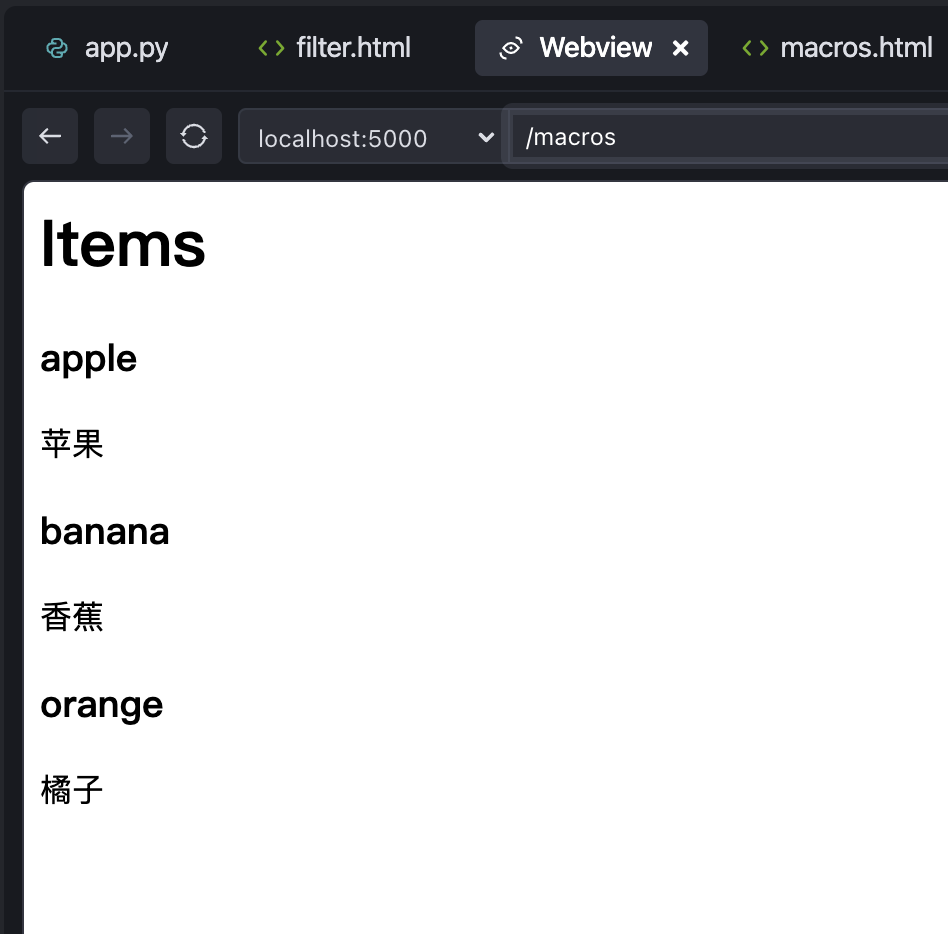
| {% macro render_item(item) %}
<div>
<h3>{{ item.title }}</h3>
<p>{{ item.description }}</p>
</div>
{% endmacro %}
|
使用宏: macros_demo.html
1
2
3
4
5
6
| {% from "macros.html" import render_item %}
<h1>Items</h1>
{% for item in items %}
{{ render_item(item) }}
{% endfor %}
|
app.py
1
2
3
4
| @app.route('/macros')
def macros():
return render_template('macros_demo.html',items=[{"title":"apple","description":"苹果"},{"title":"banana","description":"香蕉"},{"title":"orange","description":"橘子"}])
|
变量不正确时的效果
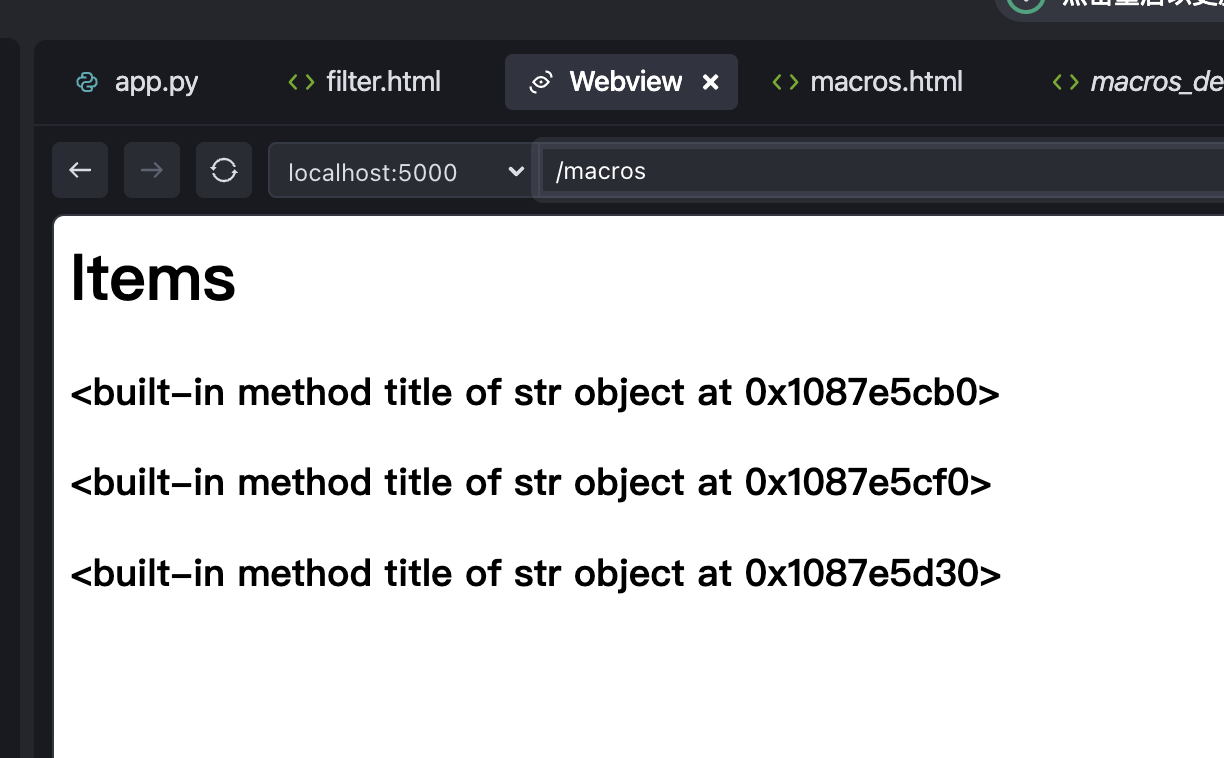
正常的显示
安全性
security.html
1
2
3
4
5
6
| <html>
<head> security </head>
<body>
<p>{{ user_input }}</p>
</body>
</html>
|
1
2
3
| @app.route('/xss')
def xss():
return render_template('security.html',user_input='<script> alert(1) </script>')
|
自动转义:Jinja2 默认会对模板中的变量进行自动转义,防止 XSS 攻击。
<script>标签不会被认为是html元素

模板上下文
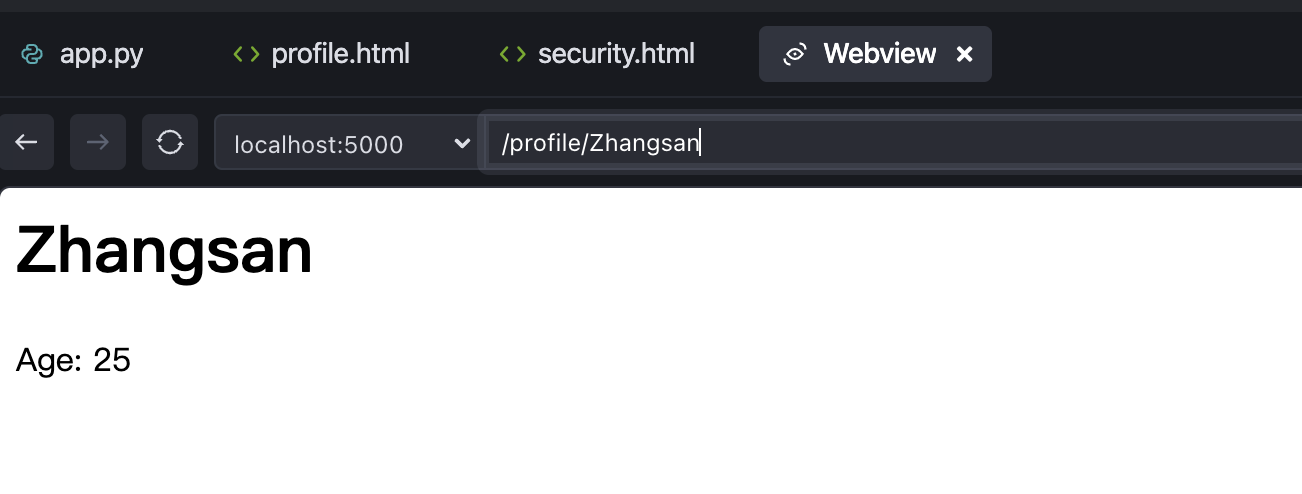
视图函数中传递的变量成为模板的上下文,这些变量可以在模板中直接使用。
profile.html
1
2
| <h1>{{ user.name }}</h1>
<p>Age: {{ user.age }}</p>
|
app.py
1
2
3
4
| @app.route('/profile/<username>')
def profile(username):
user = {'name': username, 'age': 25}
return render_template('profile.html', user=user)
|
Demo
Flask
参考
- Flask模板渲染


